Your cart is currently empty!
Tiger Face Watercolor Painting
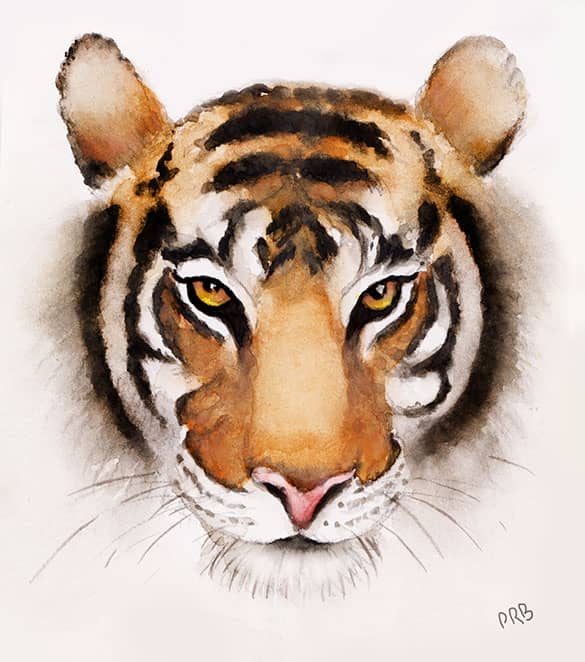
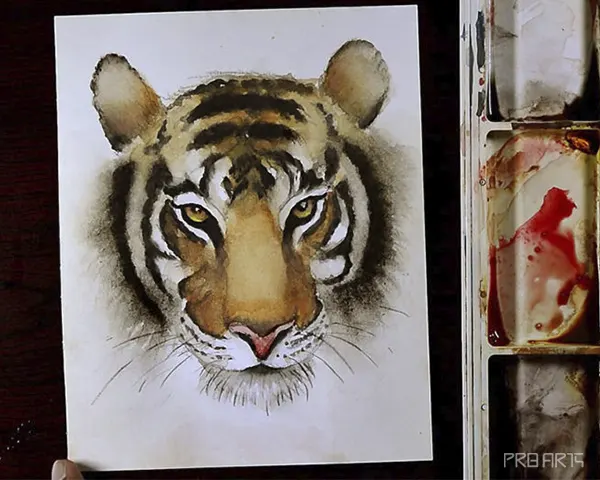
In this watercolor painting tutorial, you will learn how to paint a tiger face in an easy step-by-step method
Please draw a tiger face sketch in the front view or you can download the free image for practice use
You can print it on an A4 size watercolor chat paper or draw the same sketch on the chat paper
You can use any chat paper you like but I recommend 300 GSM watercolor paper for beginners, for more info about the chat paper – click here
This tiger portrait painting step-by-step guide tutorial is designed for beginners
Materials: Chat paper – 300gsm watercolor paper or above will be good for beginners ( I’m using normal chat paper )
Colors: Burnt Sienna, Yellow Ochre, Orange, Black, Vermilion Hue, Crimson, and Burnt Umber ( use watercolor tubes )
Brush: Brustro Round No 4, 2, 0 sizes
About The Tiger’s Face Portrait – Watercolor Painting Tutorial
You will understand the basic painting process from start to finish
Learn how to paint a basic portrait painting in watercolor
Understanding the light tone, mid-tone, and dark tones from this art tutorial
Please note all these painting steps are designed for beginners
Step By Step Tiger’s Face Painting
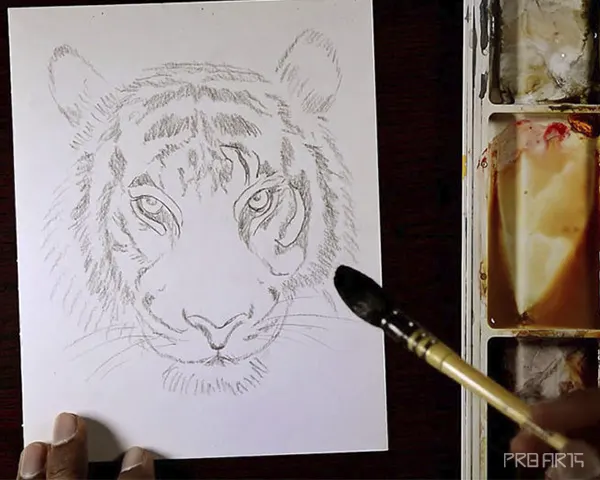
Step 1: Draw the tiger’s face sketch
Draw a tiger face sketch before the painting process
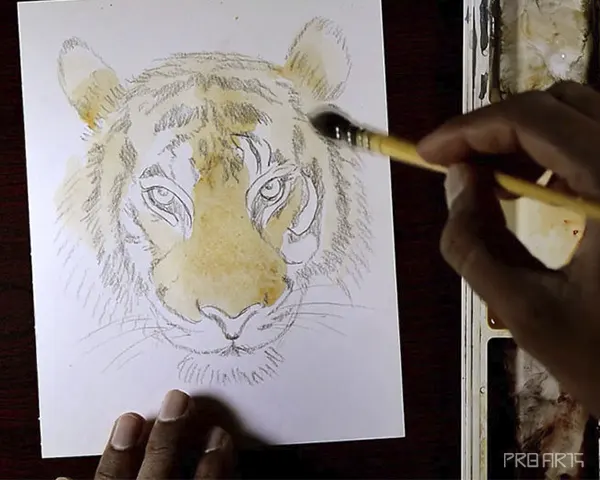
Step 2: Let’s start with a light shade
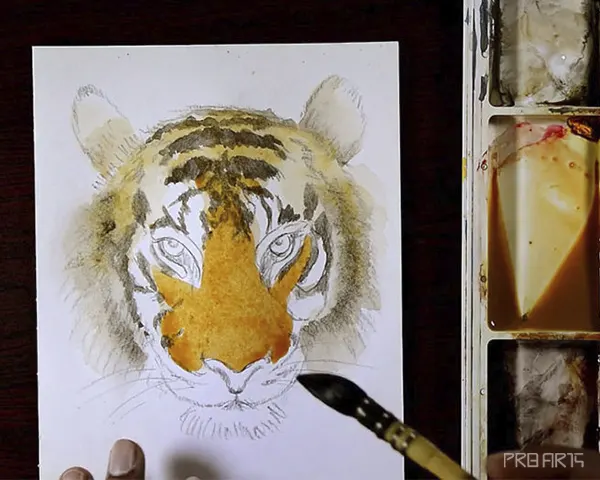
Leave the white color area on the tiger’s face, and paint the mid-tone area first, for easy understanding, I shaded the black fur with a pencil. So leave the black fur area also and only apply the color where it is necessary. I’m using a yellow ochre shade for the mid-tone area
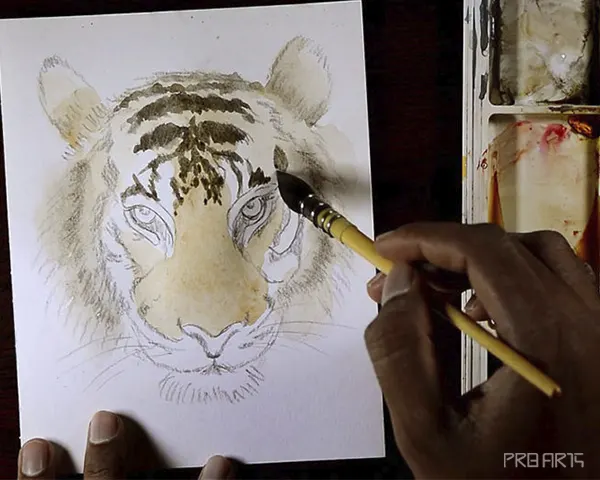
Step 3: Paint the second coat
Now mix burnt sienna with black and paint on the fur area. Don’t use too much black, it will create your painting dirty, so please be careful
Step 4: Paint the third color coat
Now let’s paint a second coat of some mid-color tones when it is still wet ( mix yellow ochre with burnt sienna )
Step 5: Paint the dark color tones
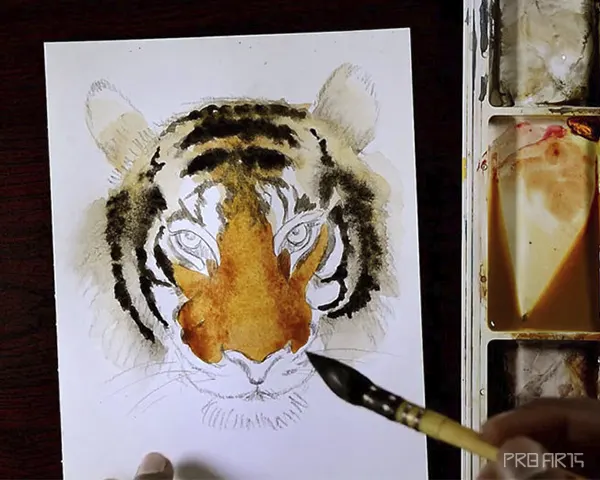
Paint the dark color tones to create depth and volume. Your painting brush strokes should be gentle and forget about the details, just focus on applying the color
Step 6: Paint the tiger’s eye
When painting near to the eye, be careful if one brush stroke goes wrong the whole painting will be damaged particularly in this watercolor medium
Paint the outer side of the eye with dark black color
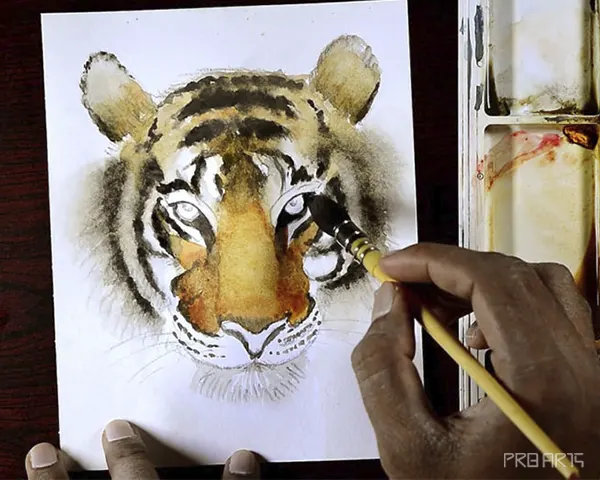
Paint a base layer of lemon yellow for the eyeballs and also mix orange and a little bit of burnt sienna to create depth in the ears and the surrounding facial area
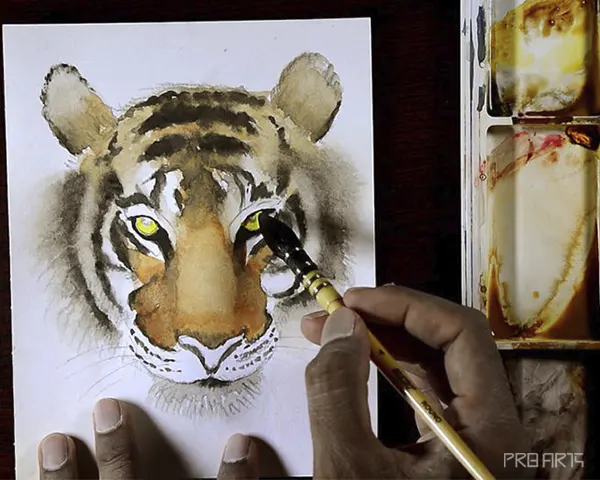
Mix orange and burnt sienna colors and paint the upper part of the eye to create depth
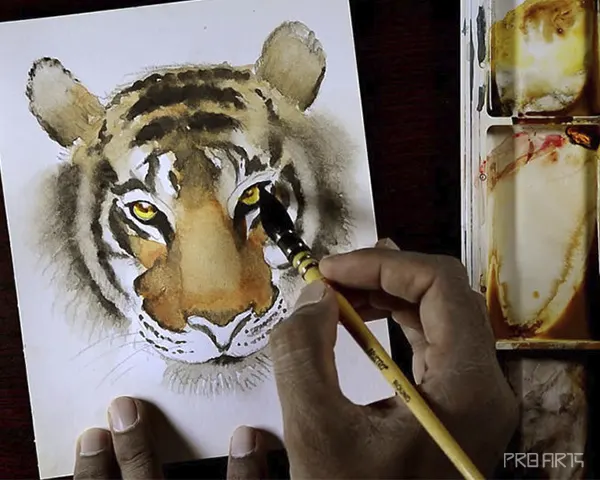
Paint the black spot in the middle of the eye and leave a white dot area for highlights
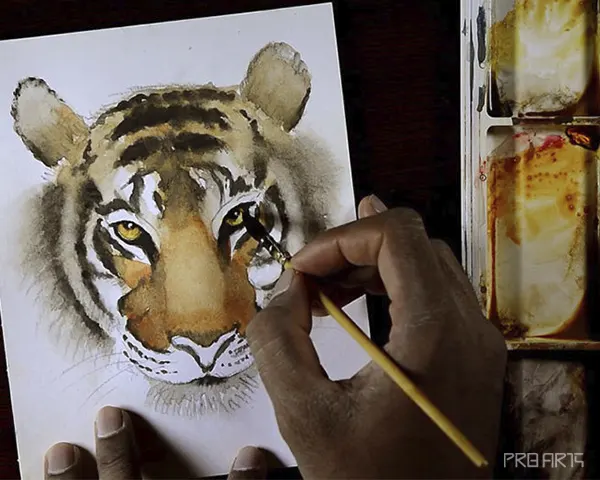
Step 7: Tiger’s nose painting
Paint a light coat of crimson color as a first layer on the nose, then mix burnt umber and vermilion hue to paint the depth in the nose as shown in the image below

Step 8: Painting the depth tones
Paint a natural black shade for the final result, don’t paint the entire black in the black area, I’m leaving some areas for creating the depth tones
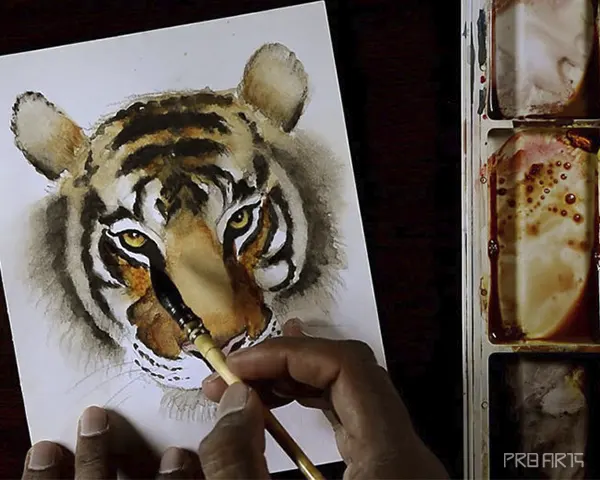
Step 9: Paint the vibrissae
Paint the vibrissae one by one with a small round brush. Try to complete the hair with a single brush stroke
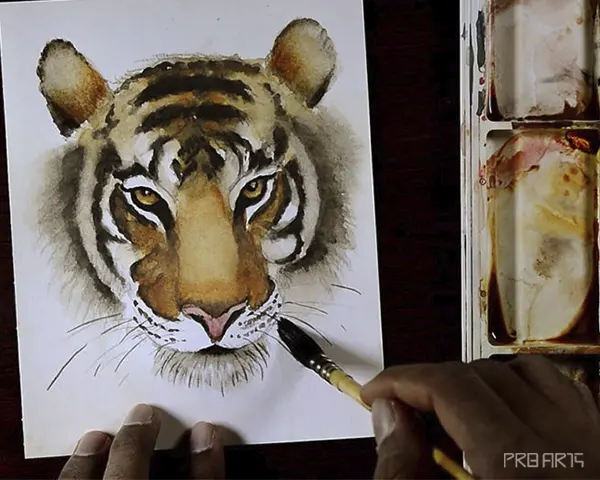
Step 10: Final touch-up
Mix burnt sienna, yellow ochre, and orange, apply to the mid-tones like this, and leave the black fur. Paint direct black on the fur when it is dry
Quick Tip:
Paint the outer fur when you completed the inner part of the painting and add dark tones where it is necessary
Check this Tiger Face Watercolor Painting video for easy understanding
I hope you like this tutorial, thank you for visiting my website.